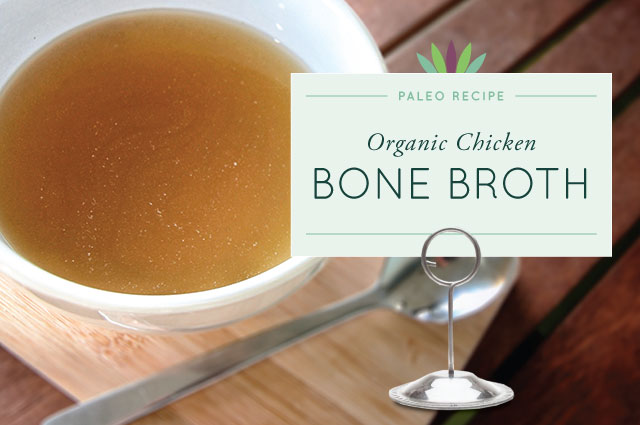
Chicken bone broth is one of the basic ingredients you should have in your kitchen at all times. Broth can be used as soup bases, for cooking rice, sautéing vegetables and simply drinking straight for brekkie!
Bone broth is the #1 thing you can consume to:
- Support your gut
- Overcome foods intolerances and allergies
- Support joint health
- Help maintain a healthy immune system
Chicken soup isn’t just good for the soul: there’s a reason that it’s prescribed by doctors and mothers alike when you’re feeling under the weather. All bone broths beef, chicken, fish, lamb and more are staples in the traditional diets of every culture around the world and the basis of all fine cuisine. That’s because bone broths are nutrient-dense, easy to digest, rich in flavor and they boost healing. Learn more in my article The Healing Power of Bone Broth.
Bone broth or stock was a way our ancestors made use of every part of an animal. Bones and marrow, skin and feet, tendons and ligaments that you can’t eat directly, can be boiled then simmered over a period of days. This simmering causes the bones and ligaments to release healing compounds like collagen, proline, glycine, and glutamine that have the power to transform your health.
Serves 10 | Prep Time: 20 min | “Cook” time 2-24 hours
Ingredients
 3-5 chicken bones – can be breasts, thighs, feet, whatever!
- 1-2 small yellow onions, cut in half
- 4 carrots, unpeeled and halved
- 4 stalks celery with leaves, cut in half
- 20 sprigs fresh parsley
- 20 sprigs fresh thyme
- 20 sprigs fresh dill
- 1-2 heads garlic, unpeeled and cut in 1/2 crosswise
- 2 Tbs sea salt
- 1 Tbs whole black peppercorns
Recipe
Step 1
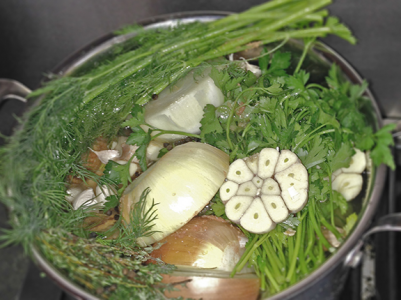
Place the roasted chicken parts, onions, carrots, celery, parsley, thyme, dill, garlic, and seasonings in a 16 to 20-quart (15-20 liter) stockpot.
Step 2
Add 7 quarts (liters) of water and bring to a boil. The amount of water does not have to be exact. You can simply place all your ingredients in the pot and fill to the top with water.
Step 3
Add two tablespoons of apple cider vinegar if you wish to increase mineral content.
Step 4
Once your stock boils, lower the heat and simmer uncovered for 4-24 hours. Set on low if using a crock-pot. If you cover the liquid will evaporate too quickly and can even burn!
Step 5
Add more water if needed as the stock reduces. Skim the scum that rises to the top every couple hours.
Step 6
Strain the entire contents of the pot through a colander and discard the solids.
Step 7
Pack in containers and refrigerate for up the three days or freeze for up to 3 months.
Vegetable Additions
Your broth may be improved in a number of ways. You will always want to use your base vegetables such as onion, carrot, and celery for their dynamo flavor combination. Do not spend much time chopping them or removing their ruffled leaves and skin. If they are clean (and cut in half in the case of an onion), add them to your broth. Add anything else you have laying around as well if you wish. Exceptions include broccoli, turnips, cabbage (and related foods such as Brussels sprouts), green peppers, collard greens, and mustard greens. They will make your broth bitter.
You can even make broth with no vegetables whatsoever and they will still turn out great. There is no set recipe for success.
Roast your Meat
I would always roast your chicken before using it to make bone broth. This is easily done by simply using left over chicken bones or a whole carcass you ate for dinner. Roasted chicken bones have a better flavor than using raw bones or raw chicken pieces.
Some people add meat along with bones to make a bone broth. Some people will put an entire chicken in the crock-pot to simmer and then use the broth for soup and pick the meat off the bones. People will also grab meat from their refrigerator and add it to their bone broth. Up to you.
In my kitchen, you will never find meat in my pot unless it is clinging to a previously cooked and picked-pretty-clean bone. I just find the broth tastes better when it’s only made from bones. That’s just my personal preference. You will also benefit more from the bones themselves since they will be more directly exposed to the broth water.
Prep your Bones
Roasting bones will add a rich flavor to your broth but it will also darken it. We consider this step to be optional, but I tend to roast my soup bones when I have time to add more flavor to my broth.
If you have a butcher knife, I think it is helpful to cut the bones in half to have all that wonderful marrow and super healthy DHA fats leach into your broth. Just makes it easier for the good stuff to get into your stock.
You can also make more than one batch of broth from one set of bones. Use them two or three times until they fall apart.
Adding Vinegar
You can add vinegar to draw more of the mineral content out of your bones. Add about two tablespoons per gallon (4 liters) to your stock. If you do this, use a decent tasting vinegar like apple cider vinegar. White vinegar tends to ruin broth, but that is a personal matter. If you like white vinegar in your broth, by all means, add it. If you don’t use vinegar, but just keep cooking the bones until they disintegrate.
Boiling Versus Simmering
You will hear just about everything when it comes to cooking bone broth and, the fact is, all methods work pretty well. If you are seeking a “clear broth,” as is common in French cooking, you want to simmer your broth. If you are using your bone broth as a base to cook beans, clear broth does not matter at all and you should not worry too much about it. Boil away.
Bone Broth Storage
Broth will last 2-3 days in the fridge. The best way to store broth is in your freezer. Some people will put broth in ice cube trays so that they can grab a cube or two and add it to cooking. Some people will freeze broth in larger or single use freezer containers.
Takeaway
Simmering bones over low heat for an entire day will create one of the most nutritious and healing foods there is. You can use this broth for soups, stews, or drink it straight. The broth can also be frozen for future use. Keep in mind that the “skin” that forms on the top after you refrigerate the broth is the best part. It contains valuable nutrients, such as sulfur, along with healthful fats, so just stir it back into the broth.
Bone broth used to be a dietary staple. Elimination of this food from our modern diet is largely to blame for our increasingly poor health.
Both broth is simple and inexpensive to make at home and also allows you to make use of a wide variety of leftovers. When you add all the benefits together, it’s hard to imagine a food that will give you more bang for your buck. I hope after reading this article that you start making your own broth and consuming some every day!


